Showing posts with label android. Show all posts

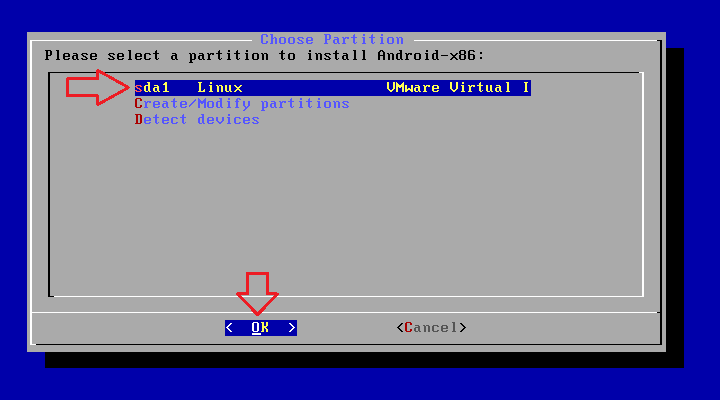
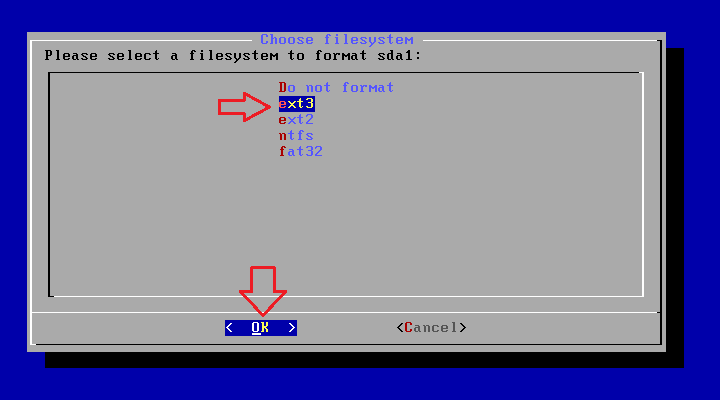
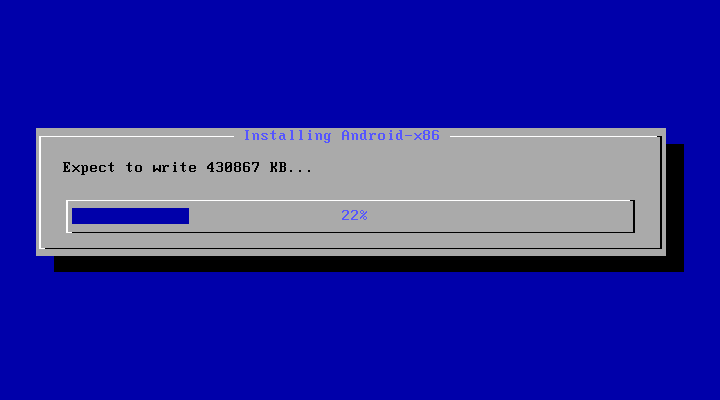
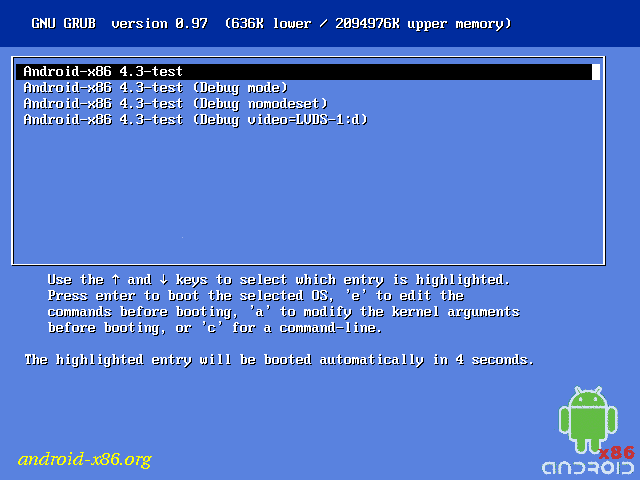
Step by step Installasi Android Jelly Bean 4.3 for PC x86

Written By Unknown on Thursday, September 19, 2013 | 8:24 AM

Berikut ini saya sharing Step by step Installasi Android Jelly Bean 4.3 for PC x86, silahkan download dulu materialnya alias ISO Installer-nya disini :
http://code.google.com/p/android-x86/downloads/detail?name=android-x86-4.3-20130725.iso
Kita bisa BURN file ISO tersebut ke sebuah CD Blank ataupun langsung mengunakannya sebagai BOOTABLE CD pada Virtual PC dengan VMWare Workstation, VirtualBox ataupun MS Virtual PC… Selamat mencoba…


8:24 AM | 1 comments | Read More

menambah memori internal pada custom rom cm7,cm9,cm10,cm10.1

Written By Unknown on Monday, August 12, 2013 | 3:45 PM


sblm ny memori sudah di partisi jd ext2/ext3/ext4 pke kompi/lepi terserah.
klo blm tau cara partisi memori cari aja di mbah google yaa.. lol
download script nya :fixed-int2ext-android-4.zip
instal script :3. Reboot ke CWM4. masuk ke "mount and storage"5. Ubah "Mount data" menjadi "Unmount data"6. Ubah "Mount system" menjadi "Unmount system"setelah itu kembali ke Menu utama CWM7. lalu pilih "instal zip from sdcard"8. pilih lagi "chose zip from sdcard">9. pilih file script yang sudah anda download td10. tunggu proses hingga selesaijika sudah selesai, kembali ke menu utama CWM lalu rebootgood luck!

3:45 PM | 0 comments | Read More

Use swap to get much more performance !

Written By Unknown on Thursday, July 18, 2013 | 6:15 PM

What is Swap?


Linux divides its physical RAM (random access memory) into chucks of memory called pages. Swapping is the process whereby a page of memory is copied to the preconfigured space on the hard disk, called swap space, to free up that page of memory. The combined sizes of the physical memory and the swap space is the amount of virtual memory available.

Swapping is necessary for two important reasons. First, when the system requires more memory than is physically available, the kernel swaps out less used pages and gives memory to the current application (process) that needs the memory immediately. Second, a significant number of the pages used by an application during its startup phase may only be used for initialization and then never used again. The system can swap out those pages and free the memory for other applications or even for the disk cache.

However, swapping does have a downside. Compared to memory, disks are very slow. Memory speeds can be measured in nanoseconds, while disks are measured in milliseconds, so accessing the disk can be tens of thousands times slower than accessing physical memory. The more swapping that occurs, the slower your system will be. Sometimes excessive swapping or thrashing occurs where a page is swapped out and then very soon swapped in and then swapped out again and so on. In such situations the system is struggling to find free memory and keep applications running at the same time. In this case only adding more RAM will help.

Linux has two forms of swap space: the swap partition and the swap file. The swap partition is an independent section of the hard disk used solely for swapping; no other files can reside there. The swap file is a special file in the filesystem that resides amongst your system and data files.  

I want that on my Phone, how to do that?
Okay, here goes the real story. Since Android is Linux, that would be possible.

What is needed:

  • Fast (Class 10) Micro-SD Card, if you dont have class 10, class 4 would be great too..
  • CWM or Partitioning software
  • Root (of course)
  • Terminal Emulator app
  • Kernel with swap and init.d support (for example our CM7, 9, 10 and 10.1 ROM)
  • Root Exploring app (for example Root Browser or Root Explorer 

Steps:
  1. Partition your SD Card, Ask Google how to do that. Make new Swap partition, or you want SD-ext too..
  2. Open Terminal Emulator, do:
    su
    fdisk -l dev/block/mmcblk0
  3. You'll see something like this:
    /dev/block/mmcblk0p3            1861        1924      514080  82 Linux swap
  4. Do the following code, change with your exact swap partition:
    su
    swapon /dev/block/mmcblk0p3
  5. Now you can check your swap partition by doing: 
    free

Now we create the script to do that automatically at boot
  1. Open Root exploring apps, head to /system/etc/init.d
  2. Make a new file, named 05swap 
  3. Edit that file, copy this up:
    #!/system/bin/sh
    echo Swap enabled
    swapon -a
  4. Save it and change the permission to :
  5. Now head to /system/etc and create new file named fstab 
  6. Open it and enter this:
    /dev/block/mmcblk0p3 swap swap
Now we set the swappiness value
*the normal value is 60, but you can change to what number you want (max 100). Higher may help to improve overall performance, while setting it to lower may increase interactivity and overall stability.
  1. Do this on Terminal Emulator
    su
    echo vm.swappiness=60 >> /system/etc/sysctl.conf
  2. Reboot and you're done.

6:15 PM | 0 comments | Read More

Cara termudah partisi sdCard menggunakan CWM

Written By Unknown on Tuesday, July 16, 2013 | 9:49 PM

Sebelum melakukannya, pastikan seluruh data yang ada di
sd card anda telah di salin ke kompi/pc atau laptop anda,di karenakan sd card akan di format/di hapus untuk melakukan proses ini. Berikut langkah- langkahnya :


saya asumsikan HH sobat sudah terinstall CWM(Clock Work Mod)
  1. Masuk mode recovery
  2. pilih apply update from sdcard
  3. pilih cwm update.zip
  4. Setelah masuk menu recovery.
    • Pilih menu Advanced.
    • Pilih Partition SD Card.
    • ingat THIS CAN NOT BE UNDONE
  5. Pilih berapa Mb yg akan di buat
    • partisi untuk Ext Size nya, misalkan
    • => SDcard 8Gb = 1024 Mb =1 Gb, (opsional)
    • => SDcard 4 Gb = 512 Mb (opsional)
    • => SDcard 2 Gb = 512Mb (opsional)
    • Jenis Ext nya terserah anda
      Di sarankan jangan memilih Ext 3 dikarenakan hanya Ext 2 dan Ext 4 sajalah yang di gunakan dan disini tergantung pada kebutuhan anda sendiri, walau sebenarnya rata-rata 1 Gb juga tidak semuanya terpakai,jadi tinggal anda putuskan saja mau pilih yang mana ukurannya.
      kalo saya sendiri memilih yang 1 Gb.
      Pada proses swap = pendukung memory internal HH silahkan diisi atau pun tidak,saya pun memberikan space untuk swap 128 Mb
  6. Jika sudah selesai proses seluruhnya, biarkan SDcard memformat sendiri
  7. Reboot
sekian, semoga bermanfaat....
9:49 PM | 0 comments | Read More

Cara memperbesar memori internal Android

Sobat blogger, disini saya coba posting lagi setelah sekian lama tidak posting, seperti judul artikel kali ini saya coba menunjukkan cara memperbesar memori interal android, kali ini menggunakan script amarulz, sebenarnya ada cara lain juga, tapi menurut saya ini cara termudah memperbesar memori internal hh anda, karena apa? sepertinya menjadi masalah bagi pengguna HP android yang mempunyai memori rendah/minim.
Sebelumnya saya kasih syarat dulu buat sobat blogger!
  1. berdoa menurut isi dompet masing-masing
  2. hh rooted
  3. sd card sudah di partisi ext2,ext3,ext4 (saran ane minimal sdcard class 6, kalo dibawah class 6 yang dikhawatirkan hh malah jadi lemot, yang belom tau caranya bisa baca di artikel lanjutan.)
  4. script amarulz download di sini 
  5. rom suport init.d
  6. root explorer download di sini
cara install:
  1. Extract 40ad2sdx zip. kemudian Copy hasil ekstrakan tadi mengunakan root exlporer ke/ system/etc/init.d
  2. Rubah permision menjadi rwxrwxrwx(r=read, w=write, x=execute) pake root explorer (atau adb chmod 777)
  3. save kemudian reboot hh sobat.
NB:
  • Tidak di sarankan menggunakan script a2sd lbh dari satu. Kalau di dalam folder init.d ada script a2sd mending hapus dulu script tersebut baru masukan script amarulz (kalau tidak di hapus pasti butlup)
  • untuk jaga-jaga backup dulu romnya pake cwm
  • memory internalnya tergantung dari partisi sdcard agan
  • FF sangat mempengaruhi keberhasilan
9:08 PM | 0 comments | Read More

CyanogenMod 9.0.0-RC0 GT-S5660 MacławStudios UNOFFICIAL for Galaxy Gio

Written By Unknown on Friday, August 3, 2012 | 10:51 PM


Beta1 is out! CyanogenMod 9.0.0-RC0 GT-S5660 MacławStudios UNOFFICIAL for Galaxy Gio

Changelog:

    small speaker fixed
    microphone fixed
    headsets are working (whole, 3/4 pin etc)
    fixed videoplayback
    new RIL – better stability
    CM10 sources updates
    Themes support
    fixed native app2sd (.android_secure)
    Macław’s libaudio (ported to JB by Wayland)
    a lot of things, which I forgotten to mention ;-)

What’s working: (waiting for your reports)

    AOSP/CM10
    RIL (full – GSM/SMS/EDGE/3G/SIGNAL etc)
    Audio
    Microphone
    Small speaker
    Sensors (strange issue with proximity)
    Project Butter (100%)
    Full 2D/3D acceleration
    Touchscreen
    SD card
    Native Android app2sd (.android_secure)
    WiFi
    Bluetooth (really, really buggy)
    Browser
    Mass storage
    Live wallpapers
    GPS (people saying it working fast)
    Deep sleep
    YouTube (thanks erikcas for his help)
    FM radio (as in CM9)
    Headphones
    Wifi tether (using an app from Play store)

What isn’t working:

    Camera (partially working, maybe in next release)
    Proximity

You can download it from here:
DOWNLOAD

10:51 PM | 0 comments | Read More

Custom Rom CyanogenMod 7.2.0 RC1 Miracle Edition For Galaxy Gio


Tests
-- WiFi: speed, pings
-- Bluetooth: works fine!
-- 3G/Data: works fine!
-- GPS: tested with GPS Status
-- Media Streaming: Tested watching live Greek TV. Absolutely amazing.
-- Sensors: tested with AndroSensor and while on call. All works well
-- Scripts: All checked with Script Manager, no errors, all executable and doing their job
-- Games: Angry Birds Space runs very good!

Installation procedure
1. Βοοt into CWM5 Recovery
2. wipe data/factory reset, wipe cache/dalvik
3. format cache/data/system/sd-ext
4. flash zip file
5. reboot
6. almost done!
7. Finalize GPS configuration by following TUTORIAL 3 or 4 - 2nd post.
8. Now it's done...enjoy!

Working..
:: Everything

Not Working..
:: Nothing. Found? Let me know


Download

10:13 PM | 0 comments | Read More